Thursday, January 6, 2011

A real test of the infrared gas heater

Yesterday the outside temperature peaked at -40°C/F and today it's still down in the 25's.
I have been keeping my overhead Calcana heater set at 50° F when not in the shop.
It has been right on the mark for the last 3 months.
Yesterday I went in and set the thermostat to 65° F and at - 40 outside it took about 10 minutes to reach a comfortable 65°. ( also a testament to the R22 Roxul wool insulation I used to encase the joint)
It also warms the metal on the table saw and the floor gets stocking foot warm in minutes.

"These devices":http://www.calcana.com/garage_why.html are everthing they claim and best of all they take no footprint with the vaulted ceiling design I chose.

From
From new shop

Bob

Putting in a dust collection system

As my odyssey continues, I have reached the point with the shop where I can install the dust collection conduit and hook it up to my new home built 2 hp cyclone.
The cyclone is styled after information obtained from the Bill Pentz website and although not an exact duplicate seems to work quite well.
From new shop

As you can see from the picture I split the system into two zones.
One zone runs for approximately 22 feet using this six-inch spiral lock tubings for the mains four-inch drops to my tools.
The second zone travels across the width of my shop to the balance of my machines. That run is approximately 30 feet long. I tried to keep the conduits low along the wall in order to maximize the particle velocity entering the system from the tools. I found that the table saw and the bandsaw both required dual four-inch ports thus maximizing the capacity of my six-inch lines.
From new shop
I used saddle type connections to the spiral lock tubing as I found it impossible to buy sweep elbows locally.

This seemed to work just fine with a small amount of flex tubing between them and the blast gates.
I used an abrasive cut off disc on a small grinder and finished out the trimming by hand with tin snips.
The takeoffs were rivited in place and sealed from the inside with high heat silicone compound. I then taped the outside of the joints with foil tape to reduce the chance of a leak.

The compound miter saw became a bit more of a challenge as it wants to not only push sawdust off the blade from the top but also spreads it quite liberally off the bottom of the blade in a large fan shape.
To help with this I constructed this plastic cage allows the saw to rotate from 50° left to 45° right and also tilt to a 45° miter without interference. To get the shape pretty close I made a mockup template out of cardboard and refined that before I cut the final shape in coroplast.
Coroplast is quite rigid yet easy to bend and fix with wide flange sheet metal screws.
I think I will face the same situation with the Radial Arm saw later although I only kept it for dadoes so I may not build an elaborate trap like this one.

From new shop
The following picture. shows the position of the blast gate.
I am able to run a 2 inch flex tube up to the opening of the blast gate to direct most of the debris into the line.
From new shop
this picture shows a vertical gate to which I intend to look up a temporary four-inch line to run such things as a planer and jointer.
From new shop
This picture shows you the approximate position of the bandsaw along with its double extraction ports the new down draft sanding station that has yet to find a permanent home along the wall.
From new shop
I hope to be able to start sorting out most of my shop materials and tools now and find permanent homes for a lot of those things that are lying in piles around the room so today is a good day for me in that I have 90% of my dust collection hooked up and running.

Cheers

Bob

Moving the machines and sorting the hand tools

There is nothing quite like a move to point out what a board hoarder and tool junkie you really are!

I had no idea that I had accumulated so much "stuff" until now.

I had a pretty good idea from using Sketchup and surveying my major tools how I was going to lay them out in the shop. What I didn't realize was how much space is taken up by hand tools, screws and nuts bolts jigs,rulers clamps. etc. etc.
I had started moving arm loads and box loads of a small stuff in my truck and would bring the heavy stuff for a mover with the truck and a hydraulic tailgate.

Because I haven't had time to do the cobblestone sidewalk over to the shop ( guess that's next spring) and in preparation for the move this Wednesday I laid out plywood over the grass and up the steps.
On wednesday afternoon the fellow arrived at our work began.

From new shop

It went quite smoothly with me helping and surprisingly, we got the tools loaded, lashed down and moved over to the new shop in less than an hour.
I had assumed we might have trouble with manipulating the curved cobblestone sidewalk beside the house and scooting the heavy equipment, some up to 500 pounds, across the grass but this fellow made made it seem easy and before I knew it the place was packed with gear.

From new shop

Right now the place is packed with nonworking gear and all forms of disarray. And I will be spending the weekend at reassembling the pieces and formally decided on their final resting places.
From new shop
From new shop

I am beginning to really see that I must say goodbye to some of my toys that are used infrequently and finally once in my life make the most use of the space available to me.
It's going to been challenging, but it should be fun.

There's still a 1000 things still to do but the smoke is clearing and I am anxious to get finished .

Gas is hooked up??? and cabinets are ready for the install

Progress on the shop over the last couple of weeks has been relatively slow so I did not bother you with an update.
My gas fitter finally appeared this Thursday and completed the installation of my infrared heater.
My wife conveniently dropped the barbecue lidon our gas quick disconnect and I was in the process of replacing the broken nipple when the gas fitter took over.....
To my surprise he tested the seal of the new parts by running the barbecue lighter along the joints to see if he could produce a flame.
*I have heard this done but it is my custom to use soapy water and a brush.*

I paid him off and thought nothing of it until I went into my shop this morning to clean up and discovered that the connection coming through the wall was on fire.!!!!
This guy apparently tests all his seals with a Bic lighter.
If the flame had been pointing toward the wall instead of into the room my shop would have been cinders.

*This "flame" had been burning for the last 24 hours!!!!*


I've been thinking about this all day quite frankly, I'm sick to my stomach .

*There is absolutely no excuse for this type of behavour it's laziness coupled with complete stupidity.*

On a more positive note, I have nearly assembled the cabinets I bought this week.

They are originally IKEA kitchen cabinets and will do quite nicely for storage in the shop.
There are no doors or shelves but they can be purchased separately .
At an average of $13 each to simply could not turn them down.


They will be quite attractive and save me a ton of time which I simply don't have right now.
In the meantime, I put up one of those tent garages beside the house to store lumber and materials over the next few months what decide what stays and what goes.


The eavestroughs are installed in the downspouts are on so now I wait for rain to test my installation.

Cedar scalloped siding on and light hooked up

At the risk of being seen as slacking off I humbly submit my most recent efforts.
"The Boss' as she has become known let me know that the shop would be best served with a faux frontage to drop the visual height of the building .
To do this I hand cut and milled some 45 lengths of 3/4"cedar fencing into cedar siding, cut and fitted same, marked the lengths with a snap line and painstakingly cut each in the form of semicircle.

Next painted and reinstalled each and every board.
The job took the better part of 8 hours and I suppose looks O.K.
Now she want me to build arches on each side to tie into the siding boards.
I may never get finished .
My gas fitter stood me up for about the 4th time.
He may be in for a bit of disappointment come Tuesday after this long weekend.

Inching closer to moving day

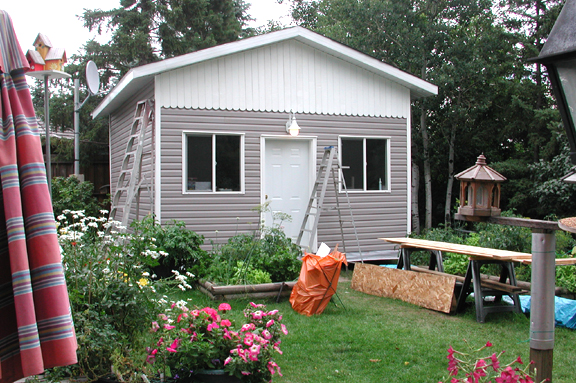
During the last few days I was able to complete the installation of the vinyl siding and wait patiently for my infrared heater.


To make a long story short I contacted a local infrared heater supplier here in Edmonton that turned out to be my worst nightmare.
When I contacted the owner Re: installation e-mailed me back and said they do not allow their customers to see installations and that I would have to appear at his store for further details.
I left it at that for or two to three weeks and went on with my construction when, out of the blue, one of his employees phoned me and asked how I was getting along with my building.
I was again encouraged and immediately contacted him to set up a meeting regarding the purchase of the right size heater and to inquire about the proper layout for same.
He in turn did not return my e-mails nor did he return my subsequent phone calls.
I began to feel like the brunt of a rather cruel joke at this point in time as I had already spent more than five weeks trying to contact this company regarding the Calcan heater I had seen advertised on their website.
Thoroughly peed off, I had my gas fitter order a gas heater from his supplier.

We quickly found out that his supplier was backordered for the item and would be another week.

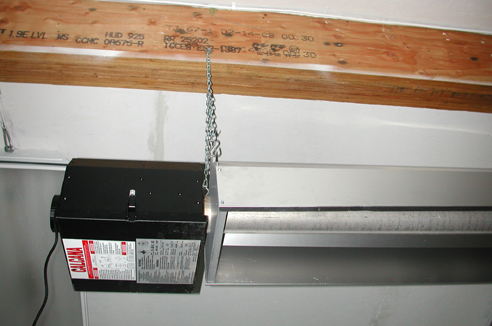
At this point I was so annoyed that I darted off a letter to the president of Calcan Heating in Calgary to defuse my frustration and lo and behold the owner of the company contacted me almost by return mail.
Within five minutes he had resolved my frustrations and was kind enough to upgrade my heater and ship it complete with exhaust manifold and fresh air intakes.
It arrived here last Friday.

*If you live any where near me and want an infrared heater call me and I'll tell you who not to call.*

With my usual luck, my forklift quit on me and I was unable to unload the heater from the truck. Normally I would just lift the box off the truck (110 lbs) but in this case they crated it and the crate was 16 feet long by 4 feet wide by 2 feet high and weighed 450 pounds.
Trucking company graciously took it back to the warehouse and redelivered it for me this Monday.
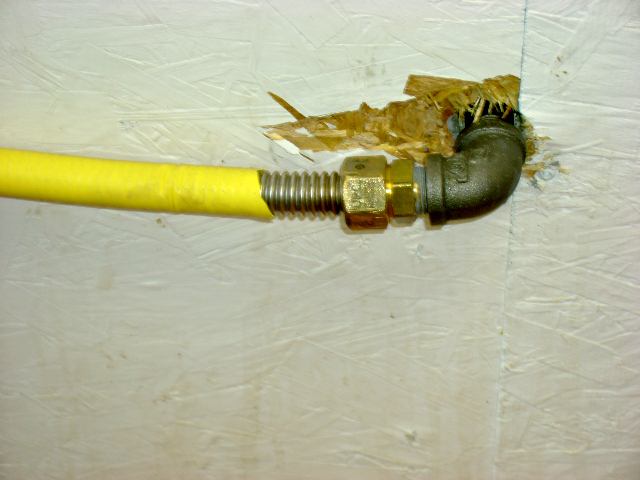
I have it up in the shop now but not plumbed as my gas fitter ran out of time and we needed to obtain two extra elbows to fit the exhaust around the center roof beam.
Thanks to the goons in Edmonton I now have to run and additional length of line to the heater electronics as we guessed wrong and put the electrical box/switch at the other end.

I managed to get the ditch filled them for where the electrical and gas lines were layed and started cleaning up around the site.


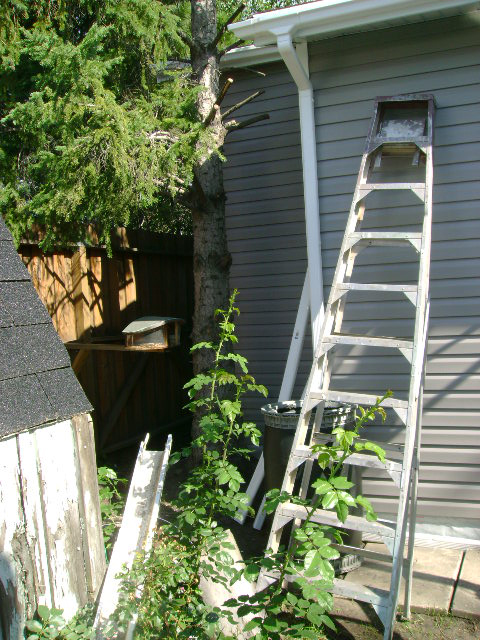
Tomorrow I will start installing the cedar siding on the front of the building that my wife wanted to make the building appear shorter than it is. It will be about 100 trips up and down the ladder with fitting and jigsawing each piece into a half circle on the bottom edge.


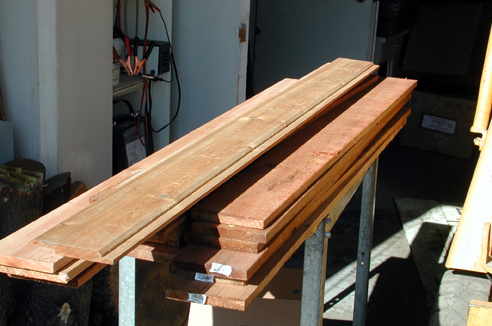
When I went purchase cedar to tackle this job and found out the local cedar pirate wanted $1.40 per lineal foot so I got some cedar fence boards and proceeded to mill my own.

First problem I ran into after rabbeting all the lumber was that I did not have a profile in all my router bits that would allow me to cut a 45° bevel.


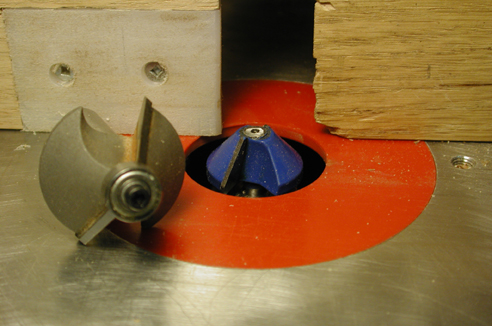
I used one of my cheap bits with the bearing and removed it and ground the top off.


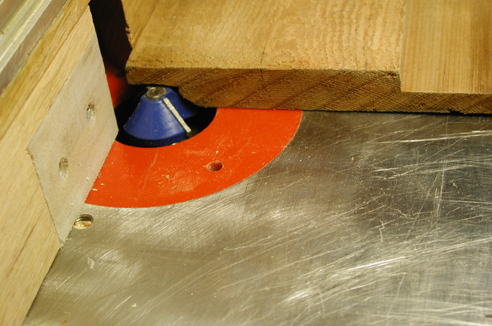
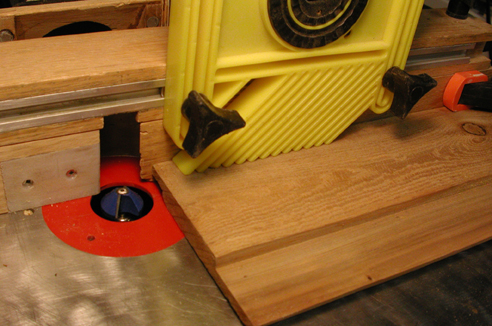
Here's a pass for the final profile:


It's been close to 30°C all week making installing siding in the direct sun like atrip across the Sahara.

Cheers
Bob

A little siding makes a big difference

While struggling to get the heater purchased and installed I tackled the vinyl siding . It seems to be pretty straight forward . I set up a cutting station and put a plywood blade in my circular saw backward and it cuts pretty easy. You have to be careful to leave a bit of room between each peice for expansion.


Sorry for the addition now but my buddy and his wife just came in from Mexico for a visit. It's too hot down there right now.

*On with the blog:*

What I'm using is a plain steel (no carbide plywood blade) . Because I have a tendency to spoil myself I have a small metal bandsaw for thicker metals and a larger plywood blade for the table saw.

m-bandsaw

The box affair in front of the shop is a jig to line up my cuts for both the soffits, fascia and my vinyl siding.
there is a bridge for the saw to slide on and the sheets align against the side rails to square them.
By putting a nail in the cut off end I can quickly make multiple cuts of equal lengths without remeasuring.